|
Equipment Management |
|
The figure in brackets on the equipment tab indicates the number of items on the site. |
 |
|
Equipment Management Panes |
|
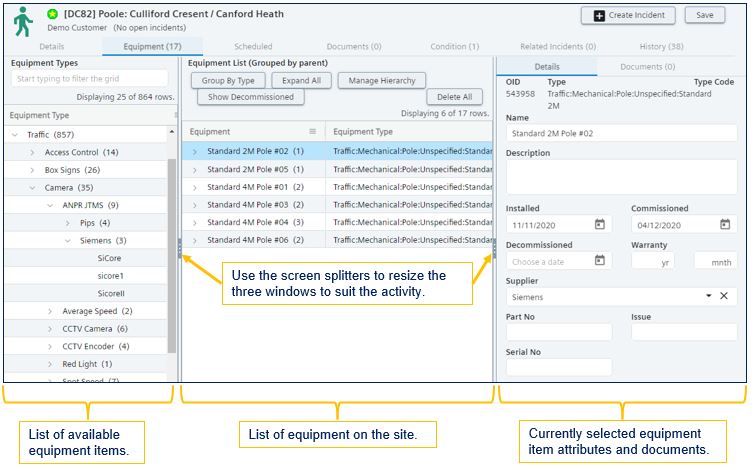
The equipment screen is split in three as shown below. The left-hand pane provides the list of available equipment types managed from the Equipment Types administration screen. |
 |
|
Play the following animation
|
|
Adding equipment to a site |
|
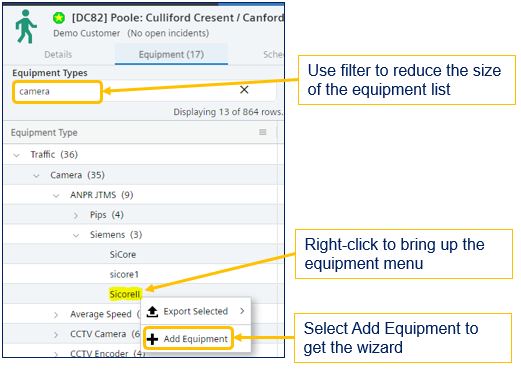
Add new equipment to the site by selecting from the list of available equipment. |
 |
|
Add Equipment Wizard |
|
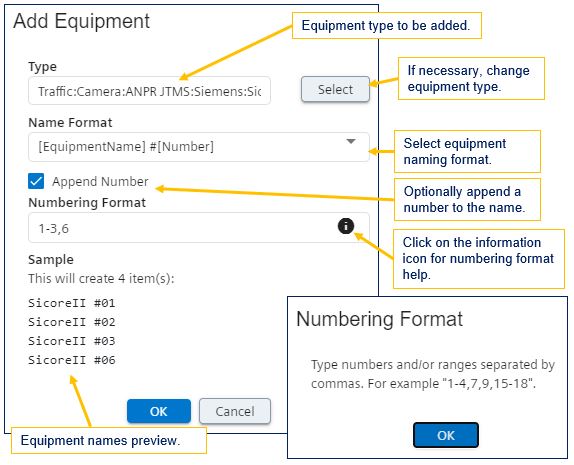
The equipment wizard, shown below, allows 1 or more items to be added in a single step. |
 |
|
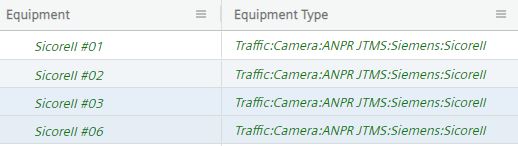
The Free Text name format provides the freedom to enter any approriate string. If not appending a number, the numbering format is replaced with a quantity box to indicate how many items are required. The sample preview will always show what will be created. The newly added equipment will be shown in green italic. Click the Save button to retain any changes and, optionally, move on to Manage Hierarchy. |
 |
|
Play the following animation
|
|
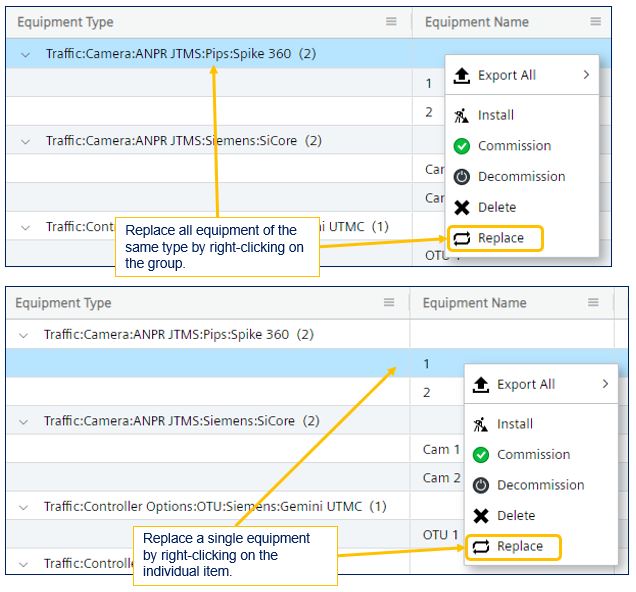
Replace Equipment Wizard |
|
The equipment wizard is also used to replace individual equipment items or groups of equipment of the same type. |
 |
|
Play the following animation
|
|
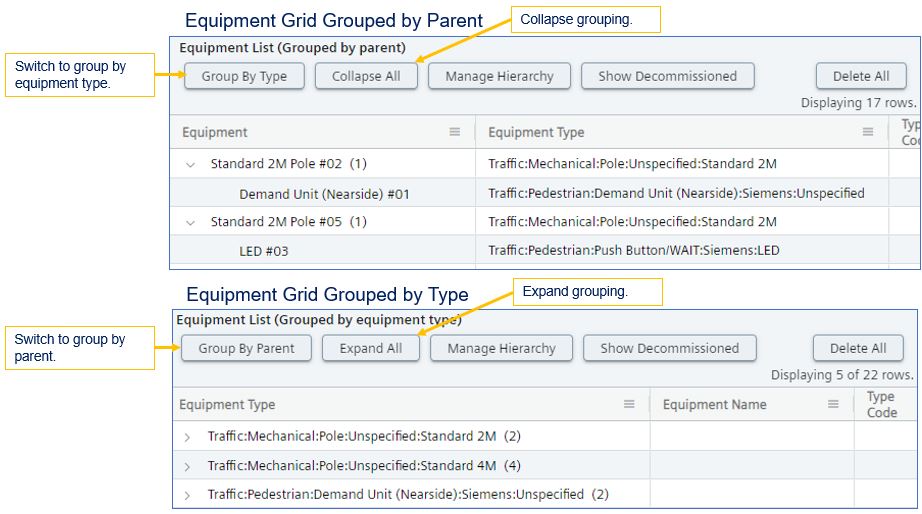
Equipment Grid Grouping |
|
The equipment grid offers grouping by type or parent. |
 |
|
Play the following animation
|
|
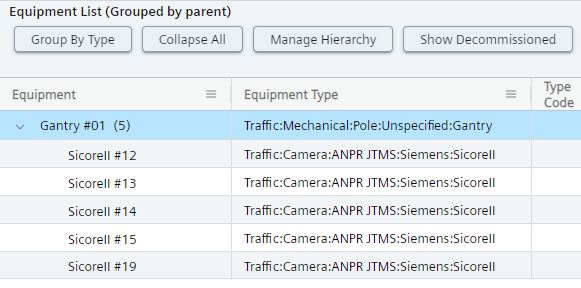
Simple Equipment Hierarchy |
|
The image below shows a simple equipment hierarchy but more complex ones are possible by adding more levels. |
 |
|
Play the following animation
|
|
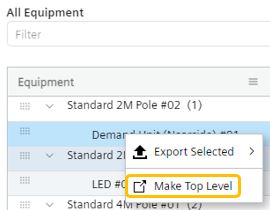
Alter Equipment Hierarchy |
|
From Manage Hierarchy, right-click an item that you wish to remove and select Make Top Level. This will return it to the left-hand pane. |
 |
|
Alternatively an item can be selected (using the drag icon) and dragged to a new parent. |
|
Play the following animation
|
|
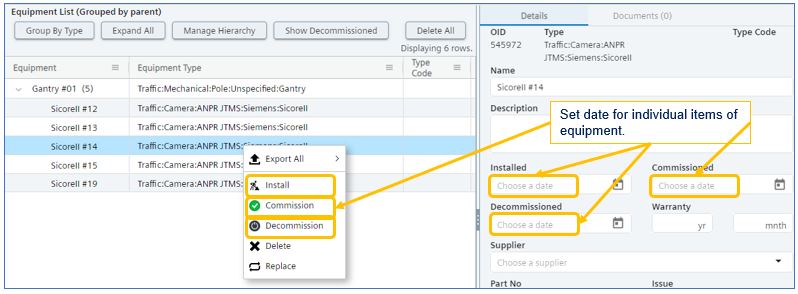
Setting Installation, Commission and Decommision Dates |
|
Single Equipment Item |
|
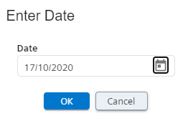
Either right-click on an individual item in the grid and select date from the date picker or directly enter a date in the right-hand pane. |
 |
 |
|
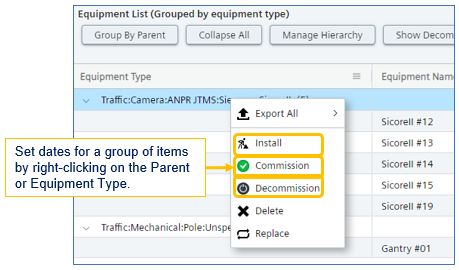
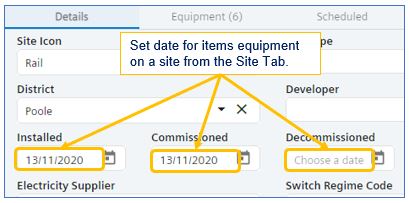
Group of Equipment Items |
|
From the Site Tab, enter a date to be applied to all site items that do not currently have a set date. |
 |
|
All Site Equipment Items |
|
Right-click on Parent or Equipment Type in the grid and select date from the date picker. This date will be applied to all grouped items that do not currently have a set date. |
 |
|
Elexon (Electrical Consumption) Reports Rely on Commissioned Dates |
|
Only commissioned items appear in Elexon reports (licensed option). |
|
Equipment Documents |
|
From the equipment tab on a site, select an equipment item and use the Documents tab in the right-hand pane to add and view equipment specific documents. Use Edit Details to add a description and/or Category to a document. Click here for more information on Document Storage. |
 |


