|
Rearranging Columns |
|
The InView presents some data in grid (tabular) form. An example of this is incidents. Each grid consists of several columns with 0 or more data rows below. This section of help shows how it is possible to customise the grid and choose which columns to display and in which order. Below is an example layout for the incident grid showing 5 columns: |
 |
|
The columns can be displayed in any order. To move a column, click on the header and drag/drop it to a new position. The example below shows that column Submitted Time has been moved to the right of column Site. |
 |
|
Altering Column Widths |
|
Click and drag the handle bar between the column headers to alter its width. Where appropriate the header text will wrap onto 2 or more lines. |
|
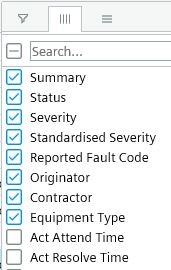
Adding/Removing Grid Columns |
|
Grid columns can be added to or removed by clicking on any column header menu |
 |
|
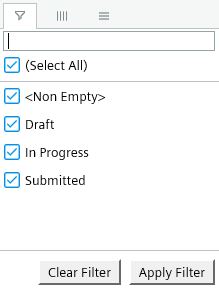
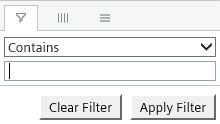
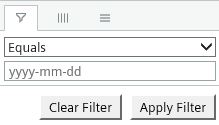
Filtering Grid Data |
|
Grid data can be filtered in each column by clicking on any column header menu |
Picklist filter for columns with small lists of identical strings.
 |
 |
Numeric filter for columns with numeric values.
 |
 |
String comparison filter for columns with large unique lists of strings.
 |
 |
Date filter for date type columns.
 |
 |
|
Sorting Grid Data |
Clinking on a column header sorts the grid by that column and an arrow appears in the column header. First click = Ascending, second click = Descending, third click to revert to unsorted.
 |
 |
|
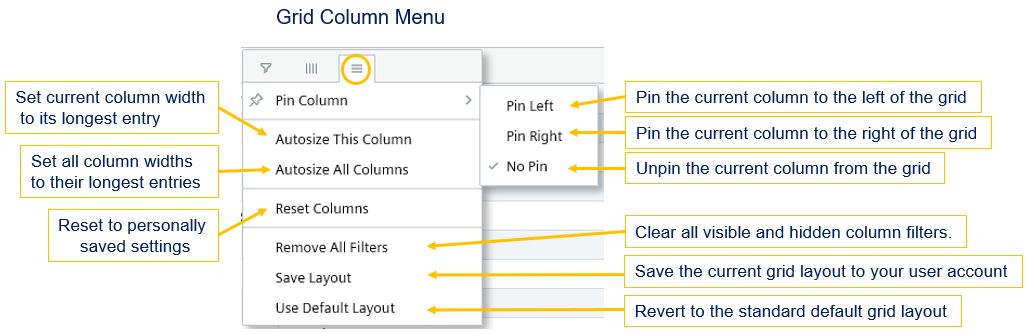
Grid Menu Options |
 |
|
Grid Menu Pinned Columns |
|
One or more columns can be pinned to the left or right of a grid. The example below shows OID and Last Updated pinned left and Status pinned right. |
 |
|
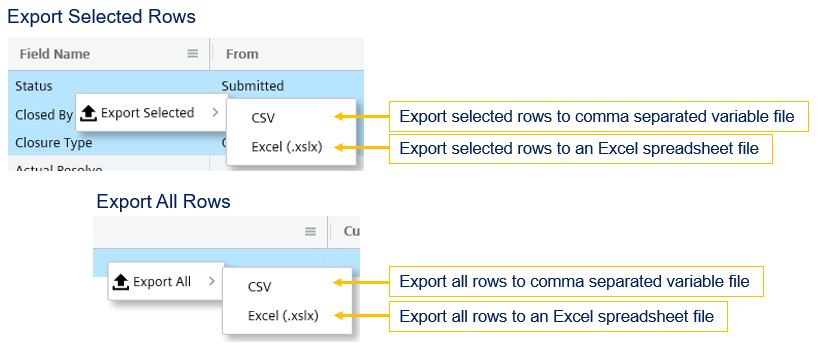
Grid Data Export |
|
Right-click on a data row to obtain one of two styles of the data export menu. Large grids with non-selectable rows require you to click on the first required row and then Shift-Click on the last required row to obtain the Export Selected rows menu. Small grids where selecting a row results in action elsewhere on the screen (e.g. Availability and Finance grids) will obtain the Export All rows.
|
 |


