Getting Started |
This Guide applies to V1.3.4.0 of the Android App, see Supported Devices |
|
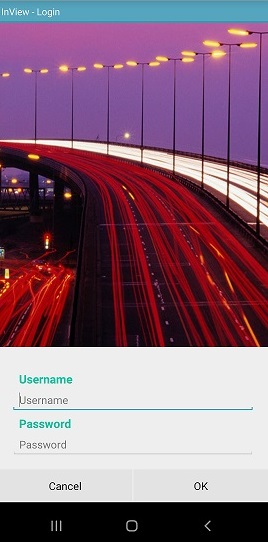
The Mobile App is available to all InView users on the Android Platform. Send requests for the Mobile App to Product Support. Once installed, click on the InView icon and the application will launch. Depending if you have previously logged in, a prompt to enter your username and password will show.
|
  |
|
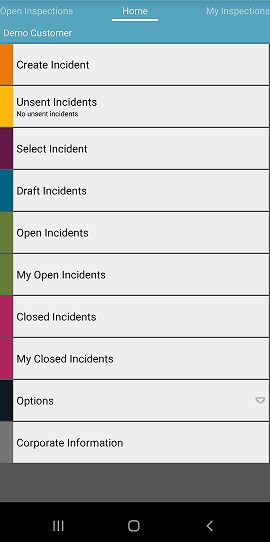
Home Screen
|
|
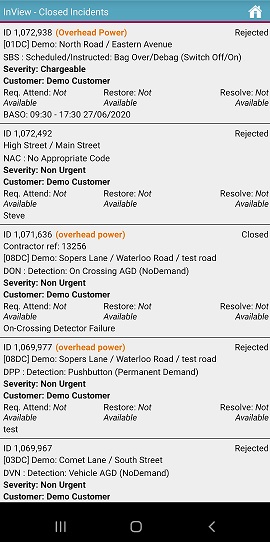
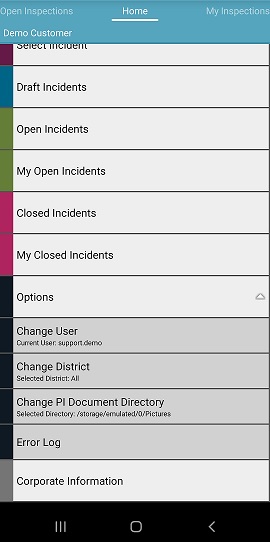
The home screen provides the main menu for the app. This includes buttons that provide pre-filtered incidents, based on their life cycle status. Draft (Created but not yet submitted), Open (Any state once submitted, not closed), Closed (Completed, includes rejected confirmed and closed) |
 |
|
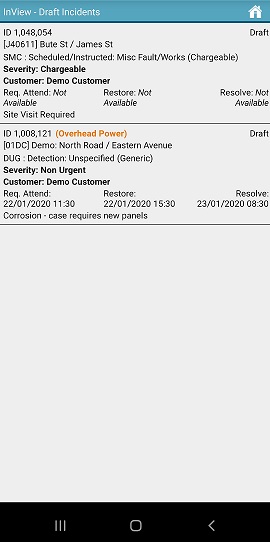
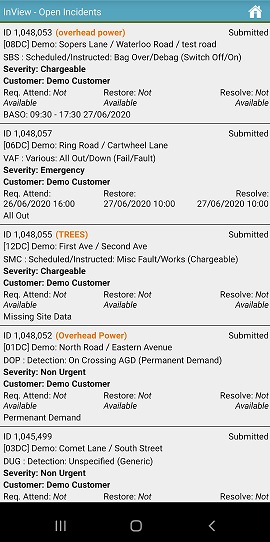
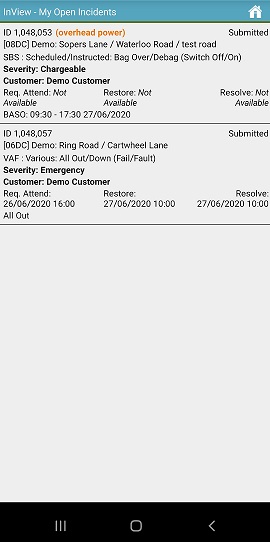
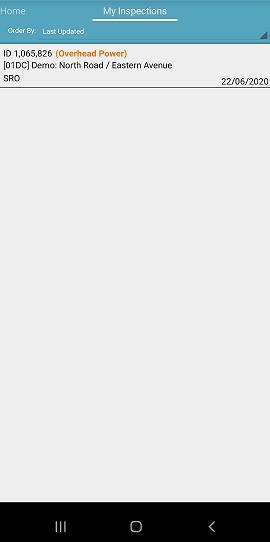
Choosing Draft, Open or Closed on the home screen will load a list of incidents with their respective status. Any hazards identified for the site are highlighted in orange, alongside the incident number. For Non-SAP based customers you will see Incidents assigned to you via InView, as shown in the My Open Incidents image. |
|
Create Incident |
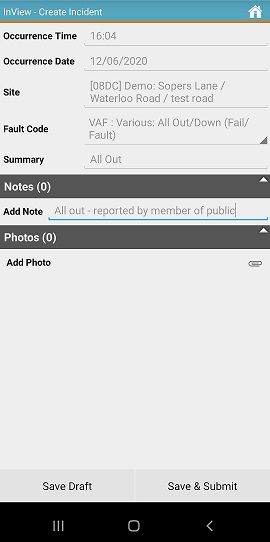
You can also create a new Incident directly from the App. You must enter the site - start typing the name or short reference, after the 3rd character has been entered it will populate a list of possible sites. Entering more characters will shorten the list.
Additional details can be added as notes and if you have the document storage option then there is the possibility to add a photograph. |
|
|
Search Incidents
|
|
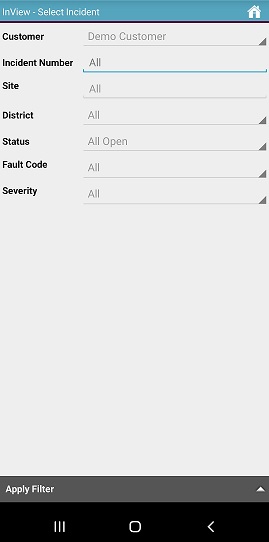
It may be necessary to search for an incident based on the status, site or even a fault code. This is performed in the Select Incident menu option. Enter the parameters on which you wish to search and press Apply Filter. |
 |
Edit Incident |
|
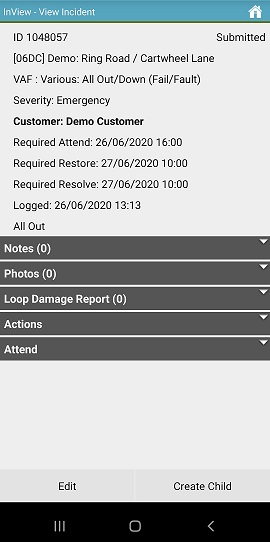
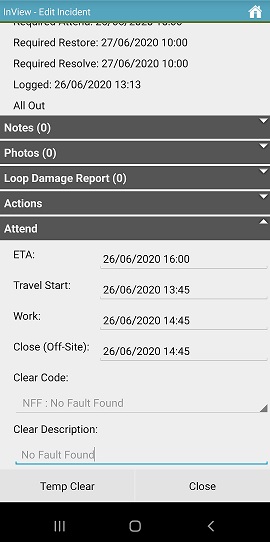
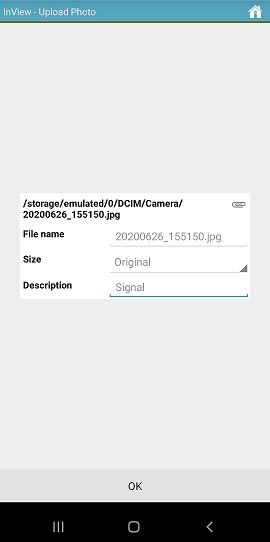
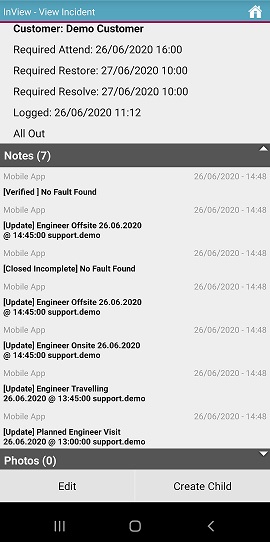
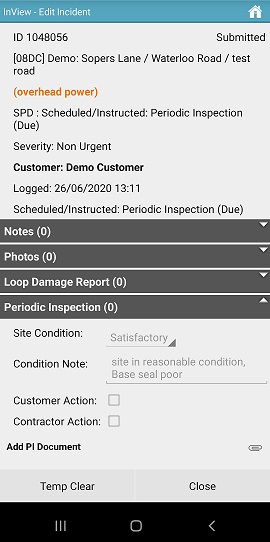
Selecting an incident from the list show the details accordingly and allows you to edit the incident. Additional details can be added as notes, if you have the document storage option there is the possibility to add a photograph using your cameras device. To add a photograph you will have to locate the image; on some devices this may be: For Non-SAP Based Customers, if permissions apply, you can 'Attend' an incident. This provides the ability to provide an estimated attendance time, and on/off site times. The process is demonstrated below, with a closed incident. |
You can also create a Child Incident, which auto populates the site details and creates a link between the incident you were viewing and the new incident (Parent and child) as demonstrated below. |
 |
|
Periodic Inspections
|
|
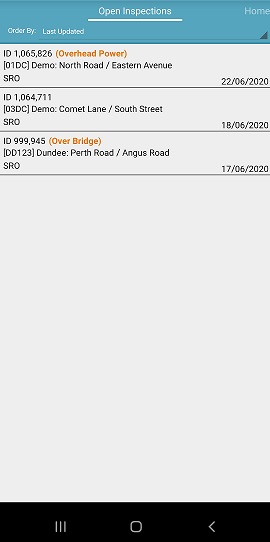
Swiping left from the Home Screen, or pressing Open Inspections at the top provides a list of open inspections against the customer Here you can see the due date, orange text indicates Site Hazards. Orange date indicates an inspection approaching the due date, where a red date indicates that it is overdue. You can also navigate to 'My Inspections' which show the inspections that have been assigned to you on InView. |
|
|
You can manage inspections via the app. Pressing on an inspection from either Open Inspections or My inspections allows you to edit them. Once you have opened an inspection, pressing Edit will allow you to edit the incident, complete the Site Condition and upload the PI documentation. |
|
User Options |
|
Some users may share a device or have access to more than one customer. The options menu allows the user to completely log off the application using the Change User menu option or select a different customers data set. Note: These actions force data to be refreshed and may take a long time, depending on the device connection and the number of customer sites/incidents. |
|
If you are unable to see certain incidents, it is advisable to 'Change User' to force a complete data refresh. |
|
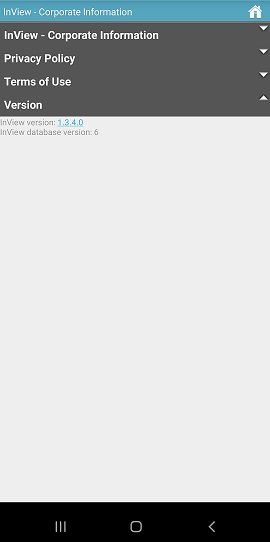
Corporate Information
|
|
Siemens Policy requires that information about Siemens is easily accessible from the App. This can be found within the Corporate Information item. Selecting an item provides additional details and links to Siemens web pages. |
 |