|
Planned Events InView offers the ability to create a Planned Switch Off/On Event over a period of time; simplifying the process and lowering the amount of incidents in some cases. This makes it easier to track a planned event within one incident. |
|
Prerequisites The Planned Event tool requires the Fault Code 'SBS : Scheduled/Instructed: Bag Over/Debag (Switch Off/On)' to be available; this can be checked by a Customer Manager user by navigating to Administration > Fault Codes. More information can be found here. |
|
Creating a new Planned Event
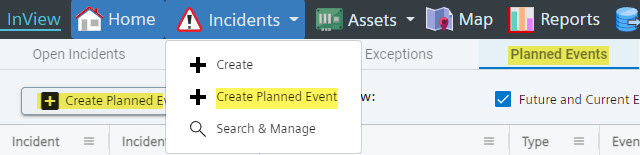
Planned Events can be created from the Incidents > Create Planned Event button on the navigation bar or from the Planned Event dashboard as highlighted below.
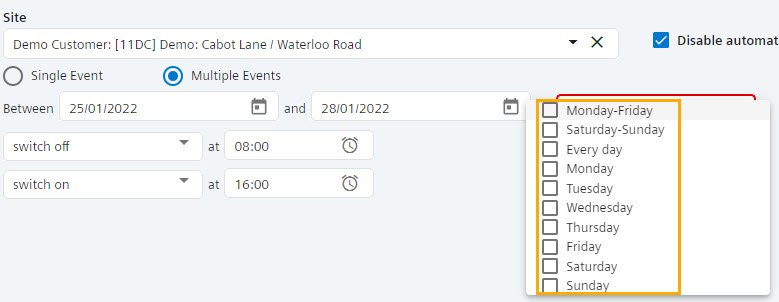
The Create Planned Event screen appears as below, where a dropdown list is used to select from a list of available sites. Once a site has been selected, you are given the opportunity to select a 'Single Event' (e.g. Switch off Monday xx:xx, Switch On Friday xx:xx) or 'Multiple Events' (e.g. Switch Off/On Daily Mon-Fri xx:xx - xx:xx).
When selecting 'Multiple Events' you are offered to select specific days, Mon-Fri, Sat-Sun or Every day.
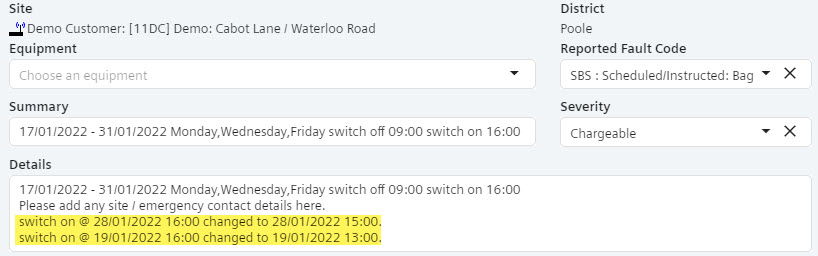
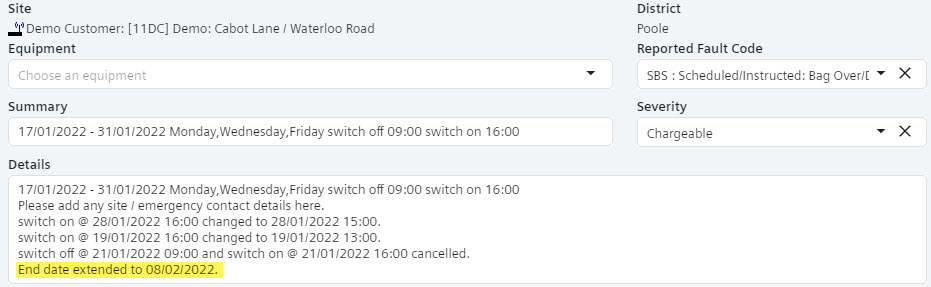
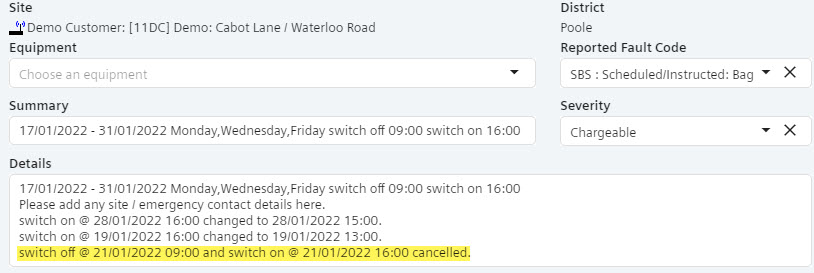
Planned Event Incident Once a Planned Event has been created using the tool, it will summarise the event within the Incident Summary and Details, offering a place to store any contact details - like an emergency or site contact. To navigate to the individual Events a new tab 'Planned Event Details' exists as highlighted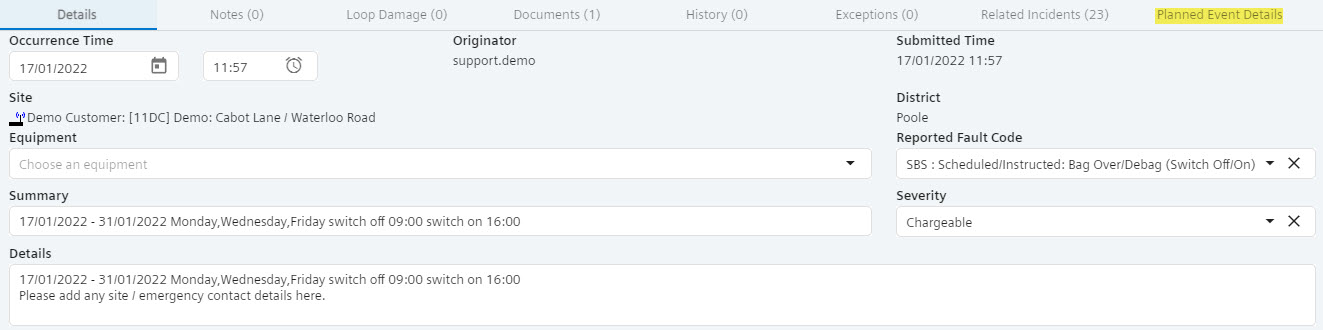
Planned Event Details/
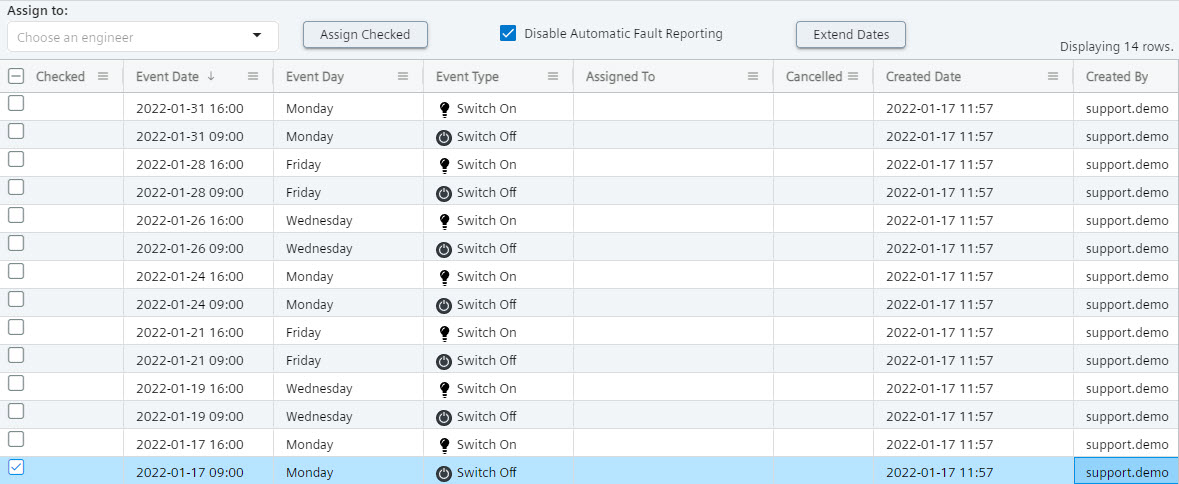
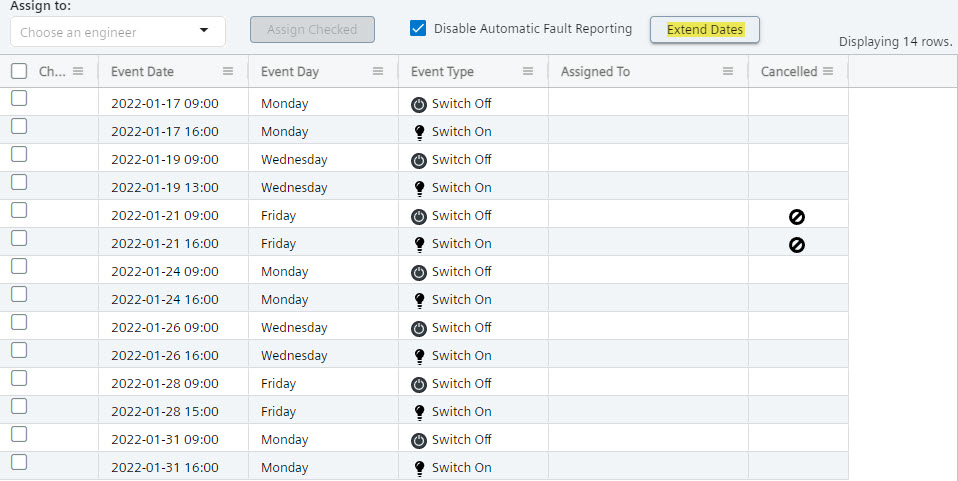
Navigating to Planned Event Details shows the individual events, which provides us the ability to Assign, Modify or cancel specific events. If you do not know who will be attending the event, leave it blank for a Contract Manager to allocate appropriately.
Modifying Event To modify a date or time, right click on the event you wish to change and select 'Edit Date'. The new date/time must be after the previous item and before the next item.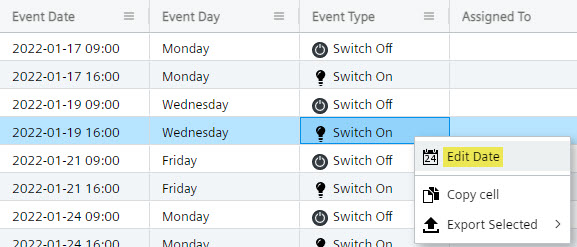 
Once the change has been made, these are reflected in the Incident Details which demonstrate clearly that the date has changed from the original time to a new time. Extending Events
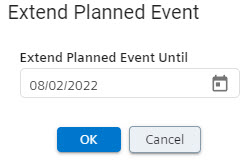
To extend the period of events, press 'Extend Dates' at the top, selecting the end date of the final switch on.
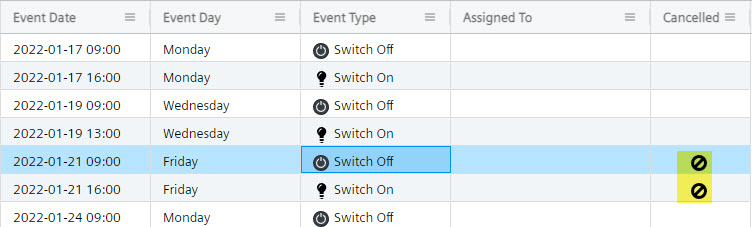
Cancelling an Event
Cancelling an Event can be performed by right clicking on the Switch Off and confirming that it will also cancel the subsequent Switch On.
|